
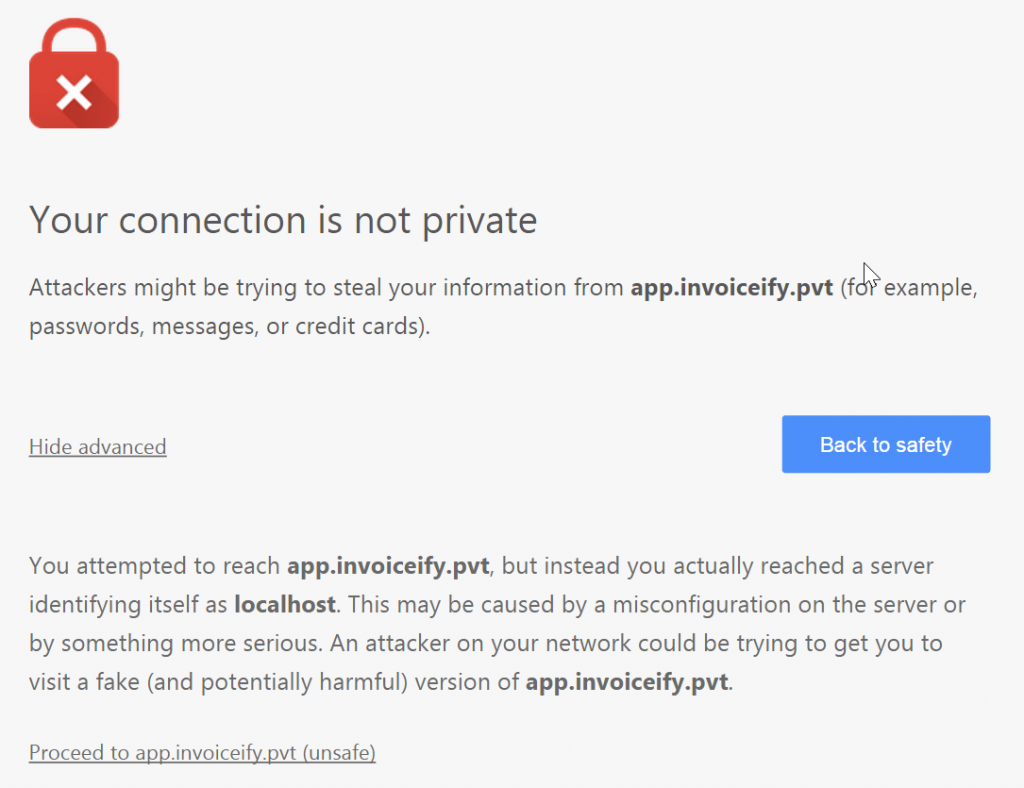
Local development for ASP.NET websites over HTTPS protocol is much easy with the IIS Express development certificate, which is pre-installed with IIS on Windows 8. But anyway when a web application runs the first time in any browser, a message similar to the following appears
Your connection is not private
Attackers might be trying to steal your information from app.invoiceify.pvt (for example, passwords, messages, or credit cards).
In this post, you will learn how to create a self-signed certificate for IIS using PowerShell.
The message appeared because IIS Development certificate issues to localhost and usually works fine if you developing for https://localhost/MyApp but in most cases, ASP.NET developers use a new website with a name similar to production URL, for example, www.mysite.pvt and modify the hosts file in order to point this name to the local machine.
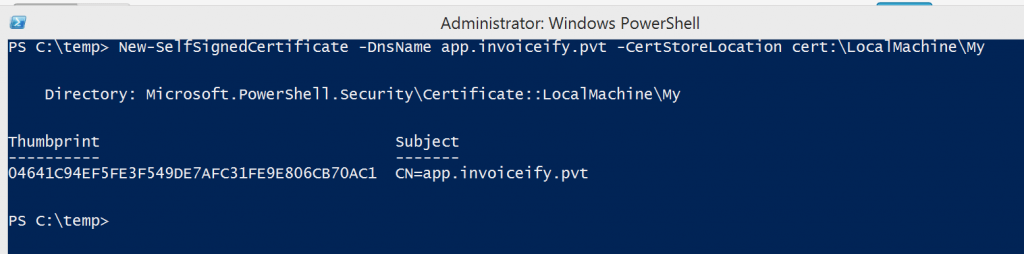
Fortunately on Windows 8.1 and Windows Server 2012, we can create a self-signed certificate with a DNS name different from localhost. In order to do it, we need to use the PowerShell command New-SelfSignedCertificateIn my case I have a website hosted on the following address: https://app.invoiceify.pvt and my PowerShell command will look like this:
New-SelfSignedCertificate
-DnsName app.invoiceify.pvt
-CertStoreLocation cert:\LocalMachine\My
You can also use wildcards in domain name, for example instead of app.invoiceify.pvt you can use *.invoiceify.pvt and all subdomains will use the same certificate.
Now we need to choose our newly created certificate in IIS

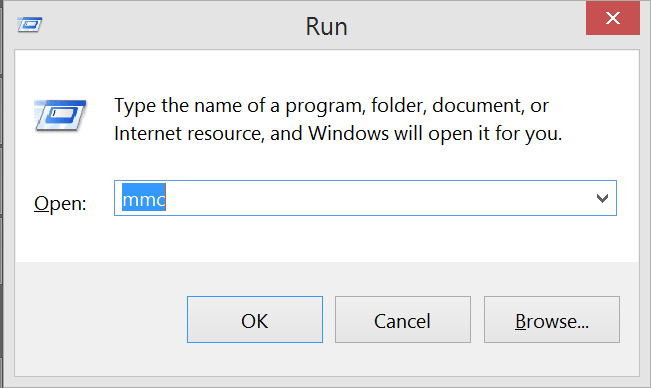
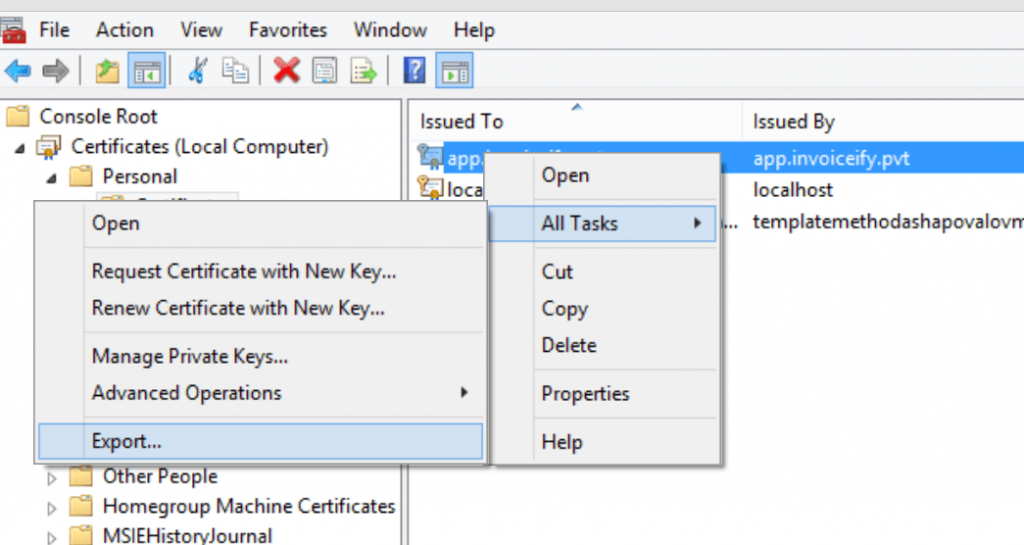
If you try to open your website now, the message which will be displayed a little bit different, not it tells then the certificate is not trusted. Let’s add this certificate to Trusted Root Certification Authorities First we need to export the certificate, press the Win+R keyboard shortcut and type MMC
Go to File -> Add-remove Snap-ins
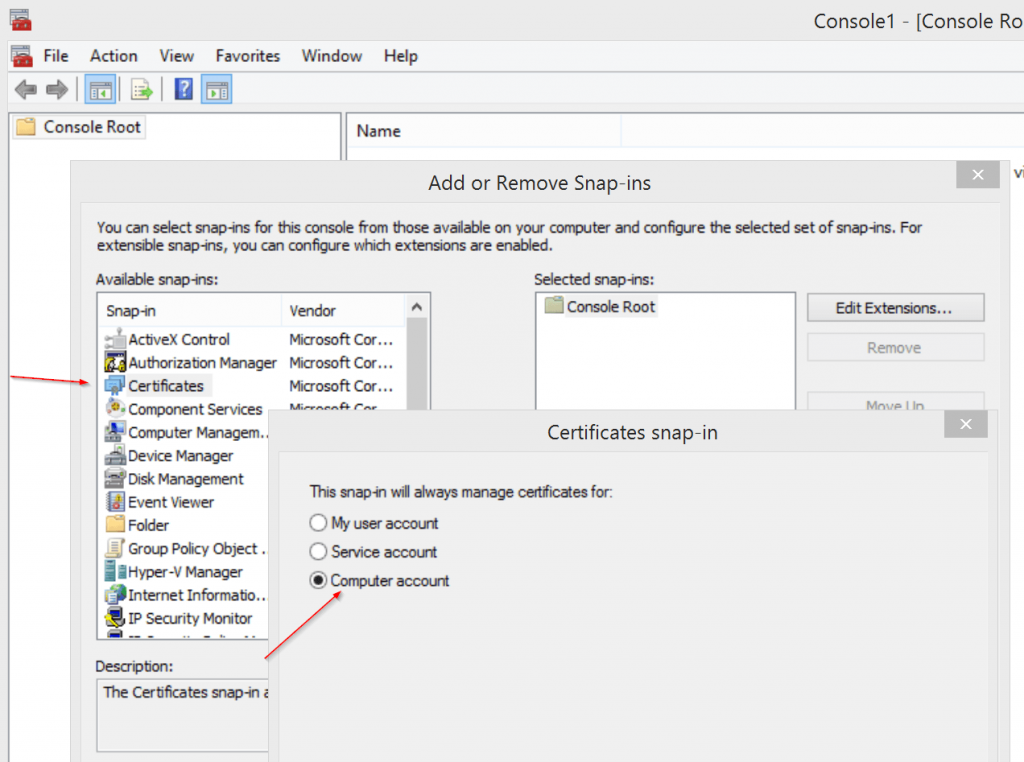
and choose “Computer account” -> “Local computer” Our certificate is located under “Personal” certificates, right-click and “Export certificate”
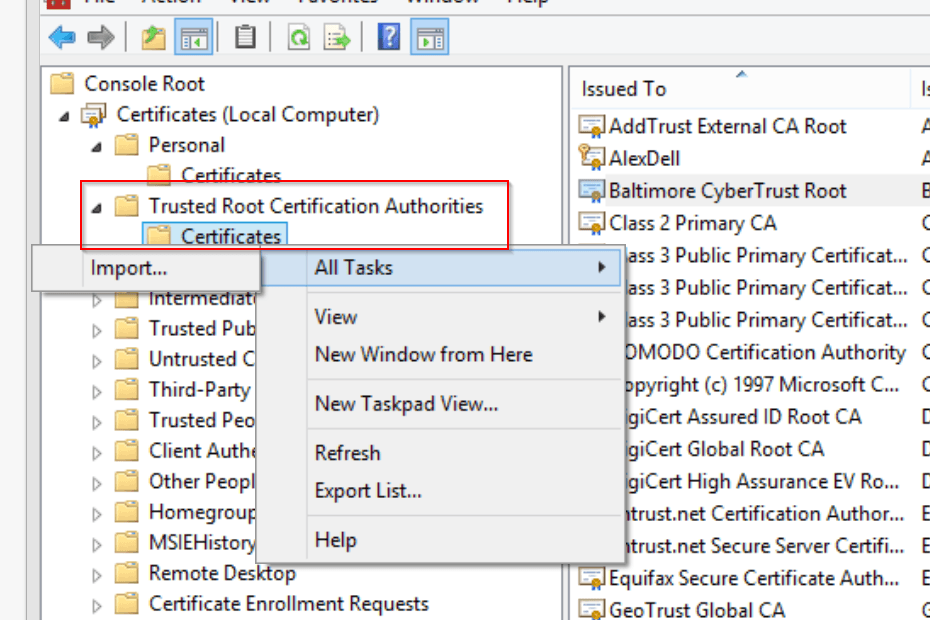
In the export wizard, you can leave all options by default, and you don’t need to export private keys. As a result, you will get *.cer file. Now we need to import this file into the “Trusted root certification authorities” location
You can leave all import settings by default and after it’s done you have to close and open your browser in order for the changes to take effect.


Alex Shapovalov is an independent contractor and founder of Yaplex – a Canadian custom software development company. Alex is a seasoned full-stack Software Developer who provides software development services in Canada and the USA.